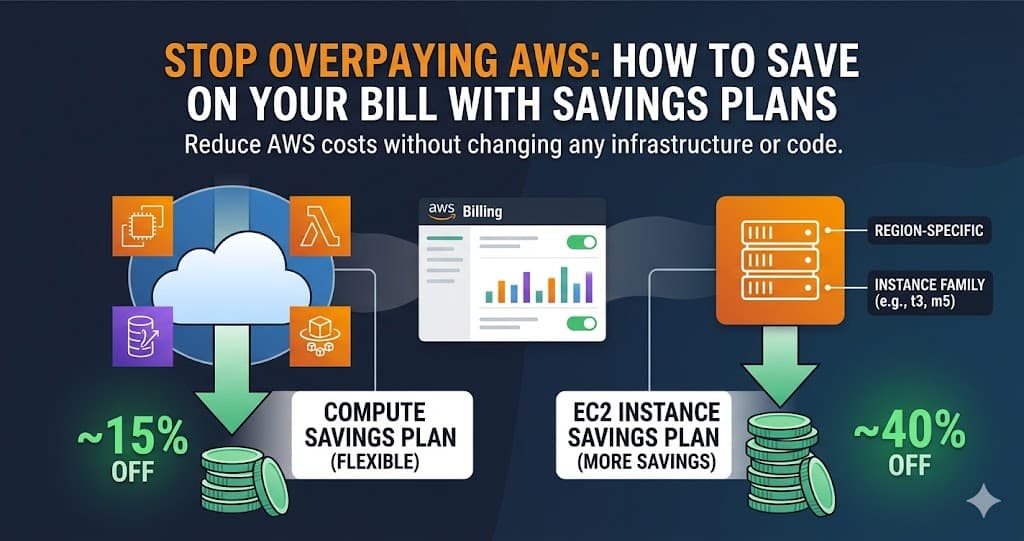
Stop Overpaying AWS: How to Save on Your Bill with Savings Plans
The guide to cutting cloud costs without changing a single line of code or doing any changes to your infrastructure.
Few weeks back, I started exploring one simple question: 👉 “What options does AWS actually give me to reduce my bill?”
At first, I was just looking for discount Like, is there some hidden setting or plan AWS offers that I’m missing?. But as I dug deeper, I got introduced to a whole new world FinOps. And honestly, this is something many of us (especially in small companies) either:
don’t know about, or
know, but haven’t really implemented properly.
Here’s the surprising part, when I checked many organisation are still not aware of this. When I started looking into it seriously, I realized, We could potentially save up to ~15% of our AWS bill just by enabling few things. That’s not small.
So in this blog, I’ll walk through:
what options AWS gives us to reduce cost
where most people miss out
and some practical ways you can actually start saving
Let’s get started 👇
Even though there are many ways to optimize AWS costs, in this blog I’m going to focus on one of those: The Savings Plan
💡 Savings Plans
AWS really wants you to use Savings Plans. At a high level, Savings Plans are AWS’s way of saying:
👉 “Commit to using a certain amount of compute, and I’ll give you a discount.”
Simple idea. But where most people get confused is what exactly are we committing to?
🧠 What are you actually committing? You’re not committing to:
a specific Instance
a specific region
or even a specific service
Instead you are committing to:
👉 A fixed hourly spend (in $/hour) for 1 or 3 years.
Think of it like telling AWS: “Hey, I’m committing to spend around $10/hour for the next year what kind of discount can you give me?”. AWS will offer you discount and as long as your usage matches that commitment you save money.
🔍 Types of Savings Plans
At the time of writing this blog, AWS offers four types of Savings Plans. But honestly, you only need to care about two of them right now because that’s where you’ll see the biggest savings (highlighted below):
Compute Savings ✅
EC2 Instance Savings Plan ✅
Database Savings plan
SageMaker Savings plan

Compute Savings
This is the most flexible option you have and honestly, this is where most teams start. Why? Because there are very few restrictions. The trade off is simple: you get slightly lower discounts compared to other plans, but a lot more freedom.
You don’t need to worry about
instance family,
instance type,
or even region.
Just commit to a certain hourly spend, and AWS automatically applies the discount across your usage.
Another big advantage is coverage. It applies to a wide range of services like EC2, Fargate, Lambda, and more so you’re not locked into a single service. This makes it a great fit when your workload is unpredictable or when you're using a mix of different services across your architecture. In this options the discounts will be in the range of around 10% to 15% approx at the time of writing this blog.
Example:
Let’s say:
Your average usage = $10/hour --> This is what you commit to AWS
AWS Says I will give you 15% discount
So instead of paying \(10/hour, you effectively pay: 👉 \)8.5/hour
Over a month (~730 hours):
Without Savings Plan → \(10 × 730 = \)7,300
With Compute Plan → \(8.5 × 730 = \)6,205
💡 You save ~$1,095/month
And the best part? This applies across services like EC2, Fargate, Lambda—no restrictions.
EC2 Instance Savings Plans
As the name suggests, this plan is specifically for EC2 instances. It comes with a few more restrictions compared to Compute Savings Plans but in return, you get better discounts.
When I say “restrictions,” here’s what I mean:
You’re tied to a specific instance family (e.g., t3, m5)
You’re tied to a specific region
That said, AWS still gives you some flexibility where it matters. You can freely change:
Instance size (e.g., t3.small → t3.large)
Operating system (Linux, Windows, etc.)
Tenancy (shared, dedicated)
So you’re not completely locked in just scoped within a boundary. In simple terms, you’re telling AWS:
“Hey, I commit to using this EC2 instance family in this region for the next year (or three) for X amount of usage—what discount can you give me?”
Because of this tighter commitment, the discounts here are higher compared to Compute Savings Plans.
Example:
Now let’s take the same scenario:
You commit to $10/hour
But this time for a specific EC2 family + region
AWS gives you 40% discount (Discount rate is an example may vary in real time)
So you effectively pay: 👉 $6/hour
Over a month:
Without Savings Plan → $7,300
With EC2 Plan → \(6 × 730 = \)4,380
💡 You save ~$2,920/month
What happens if your usage goes above $10/hour?
So what happens when you use beyond your commitment? AWS keeps track of your usage every single hour. As long as your total eligible usage in that hour is within $10/hour, you’ll get the applicable discount.
But the moment you go beyond that: The extra usage (above $10/hour) is charged at On-Demand pricing(no discount).
👉 Example:
You committed → $10/hour
Actual usage → $12/hour
Then:
First $10/hour → discounted (15%)
Remaining $2/hour → normal On-Demand pricing
But AWS does give you flexibility in one direction: You can increase your total $/hour commitment anytime by purchasing additional Savings Plans even in the middle of your current plan. You cannot decrease or edit your existing commitment. This is applicable for both the savings plans. This gives us flexiblity to increase our commitment cost if we find out that our average usage is more than what we commit.
Now that we understand what Savings Plans are and the value they bring, the next obvious question is:
👉 How much should I commit?
Committing the right number gives you the maximum advantage.
If you overcommit → you’ll end up paying for unused capacity
If you undercommit → you won’t get the full discount benefit ❌
So getting this number right is key.
How to decide the right number?
AWS already gives you a built in helper for this.
👉 It’s called “Recommendations” under Savings Plans.
This tool analyzes your historical usage and suggests an optimal $/hour commitment based on your actual workload.
How to use it
Login to your AWS account >> Go to "Billing and Cost Management" >> From Left Side panel Expand Saving Plan >> Select Recommendations
To Run recommendations
Choose Compute Savings Plan (recommended for most cases) or Or EC2 Instance Savings Plan
Select your preferences:
Term → 1 year or 3 years
Payment option → No upfront / Partial / All upfront (Upfront will give you more discount but you can also opt for No upfront which falls on your normal billing cycle)
Lookback period → 7, 30, or 60 days (This is the sample peroid)
AWS will automatically generate a recommendation for you. And it looks something like below.
Note: The menu may vary when you check them this is taken at the time of writing the blog

- 👉 Start with 30 days lookback + 1-year term + No upfront. This tells us that if we commit US\(0.750/hour for a 1-year term you could save an average of US\)0.15/hour that is 19% savings.
Now once you conclude with the plan you can click on Add Savings plan to cart and purchase it. It will get reflected on your next billing cycle
You can also use purchase analyzer to see what is the right amount for your current environment and many other things.
Purchase Analyzer:
The Purchase Analyzer gives you a deeper view before you actually buy a Savings Plan. It helps you understand things like:
Cost comparison → How your current spend compares with the Savings Plan
Coverage % → How much of your current usage will be covered by the plan
Projected savings → What you actually save with this commitment
👉 It helps you validate your decision before committing. To use this tool
Login to your AWS account >> Go to "Billing and Cost Management" >> From Left Side panel Expand Saving Plan >> Select Purchase Analyzer
Choose Compute Savings Plan (recommended for most cases) or Or EC2 Instance Savings Plan
Select your preferences:
Term → 1 year or 3 years
Payment option → No upfront / Partial / All upfront (Upfront will give you more discount but you can also opt for No upfront which falls on your normal billing cycle)
Lookback period → 7, 30, or 60 days (This is the sample peroid)
Click on Run Analysis

Making the final decision
With these insights, you can make a much more informed decision on choosing the right commitment.
And if you’re still unsure, you can always reach out to the AWS Support team they can help you arrive at a number that fits your usage pattern.
Conclusion
At the end of the day, just by purchasing a Savings Plan and committing to the right $/hour value, you can easily save around 10–15% on your overall bill (or even more, depending on the plan).
The best part?
👉 You don’t need to pay anything upfront
👉 You continue with your normal billing cycle
👉 You’re simply committing: “I’ll use X $/hour for the next 1 year”
This makes it a great starting point for many teams especially since Compute Savings Plans come with minimal restrictions, so you don’t have to worry about how you provision your resources.
What’s next?
If you haven’t tried this yet in your organization, it’s definitely worth exploring you might be leaving easy savings on the table 💰
Since this blog is already getting long, in the next one we’ll dive into Reserved Instances, where you can get even better savings—but with a few more restrictions.